Topic_02
: First program in Visual C++ IDE
Hello Viewers!
Welcome to the very first tutorial on programming. Normally,
16 bit Borland C++ IDE is used to teach programming basics. But, this
tutorial may be alien to most of you. Sixteen bit IDEs are easy
to learn, but they are not powerful. If you really want to do some
serious programming, then use modern tools.
In this series of tutorials, you will be watching the screen shots
of Visual C++ IDE, a modern compiler/IDE from "Microsoft
You can have a link to download the Express Edition of
Microsoft Visual C++ 2005![]() to download the required software
to download the required software
Coming back to the topic; in this page, you will be watching the
steps to create a new program. I expect that you know certain basics
like GUI, saving and opening files in an explorer etc. Here is the
list of steps to be taken for creating a simple C program
NOTES:
1)This is the
practical part of the tutorial. Make sure that you read the theory part.
Click here to watch it.
2) To have a better view of the images, right click on them to save
it on your disk/open in a new window
STEP - 1:
- Open
Visual C++ IDE
- Click on
"File" in the menu
- Select
"New"
- Select
"Project"
Now onwards, this kind of operations are denoted in a form
like "File => New => Project"

The above operations opens a dialog box for creating a new project.
STEP - 2:
In the dialog box above, expand "Visual
C++", select "Win32",
click on "Win32 console application", and
finally, enter a name for your first project. After that, press OK
button.

STEP - 3:
Now, the IDE opens a dialog box for project properties. In
that box, select "Application Settings".
Select the "Application type" as
console application and in the additional options, click the box beside "Empty
project".
Finally click "Finish"
button.

STEP - 4:
Perform menu operation "View
=> Solution Explorer" to
get the solution explorer

STEP - 5:
In the solution explorer, right click
on the "Source Files" and select " Add
=> New Item"

STEP - 6:
In the "Add
new item" dialog box, expand
"Visual C++", select "Code",
click on "C++
file"
Type the name of your program and then click on
the "Add" button

STEP - 7:
Now you can type your program in the text
editor. A typical program looks like this..

STEP - 8:
To execute your program, you should perform the
menu operation "Debug => Start
without Debugging"

The output:
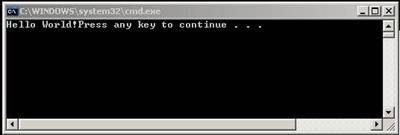
It was because of your program, computer wrote "Hello
World!". It is an instruction to you by the computer, that pressing
any key will take you back to the IDE.
Summary:
1) Create a new project by selecting windows
console application
2) Add files to the Solution by clicking on the Source
files of solution explorer
3) Type the program and execute it
Explanation:
Introduction to the Solution
Note: Please note that, VC++ is designed to solve complex
real world problems. If you really want to do some complex things, get prepared
to handle that complexity.
Remember that, we write software to solve
a problem. (That problem could be any thing like differential equation or
climate estimation or online business deals or national security or diverting
the meteors that may fall on earth )
So, when we write a software to solve a problem, we'll get
a solution.
A single solution may contain more than one project.
A single project may contain number of persons working on
different things.
Now, In this context, the problem happens to be making the
computer to say "Hello World!".
In order to do that,
1) We first start with creating a new project. At
this stage, we will be selecting what kind of project to start.
We wont start with guns and bombs to save flood victims;
we'll take food and shelter items.
In the same way, we selected the project type to be windows
console application, which means, all that we are dealing is a text based
window, through which we can communicate with the computer.
2) The IDE (expanded as Integrated
Development Environment) will automatically create a solution file for you.
(You will be asked to save that file, before you quit the IDE). And
when the situation demands, you can create another project and can add it to
this solution.
A solution must have at least one project.
3) Later we add some functioning bodies
to that project, by means of source code files. In these files, we teach
the computer "How to do the things" or we can ask the computer to do
the things, which are already learnt by it.
This concept is already dealt in the theory part of this
tutorial.
Click here to read that concept.
4) Later we ask the computer to combine
all those functioning bodies to meet our requirements, which happens to be
answering the given problem.
In this process, it is also possible to
check if we made any mistakes. It is called as debugging. (bug
means error in software). When we are sure that there are no mistakes in
our software we ask the computer to start solving the problem,(without
debugging).
Again this is a bigger topic. Click here to read
more.